
(Disclaimer: This page contains Amazon Affiliates links. If you make a purchase from one of the links, Habitot will earn a small commission at no extra cost to you.)
Create colorful salt dough decorations filled with the spices of autumn! Making salt dough is a sensory, STEM, and art activity all in one. Your child will experience the sensation of mixing together dry and wet ingredients, see a chemical reaction when the dough is heated and hardened in the oven, and get to express their creativity by decorating the salt dough in the end.
What We’re Learning & Skills We’re Building
- Creative expression – using your imagination to make art
- Early chemistry – heating gooey dough in the oven causes it to become a solid “cookie”
- Fine motor skills – holding and using tools such as spoons and paintbrushes
- Measurement – using spoons and cups to add the correct amount of ingredients to the dough recipe
Safety: Please closely supervise children around the oven and use oven mitts to prevent burns. This dough is for decoration, NOT for consumption.
Materials
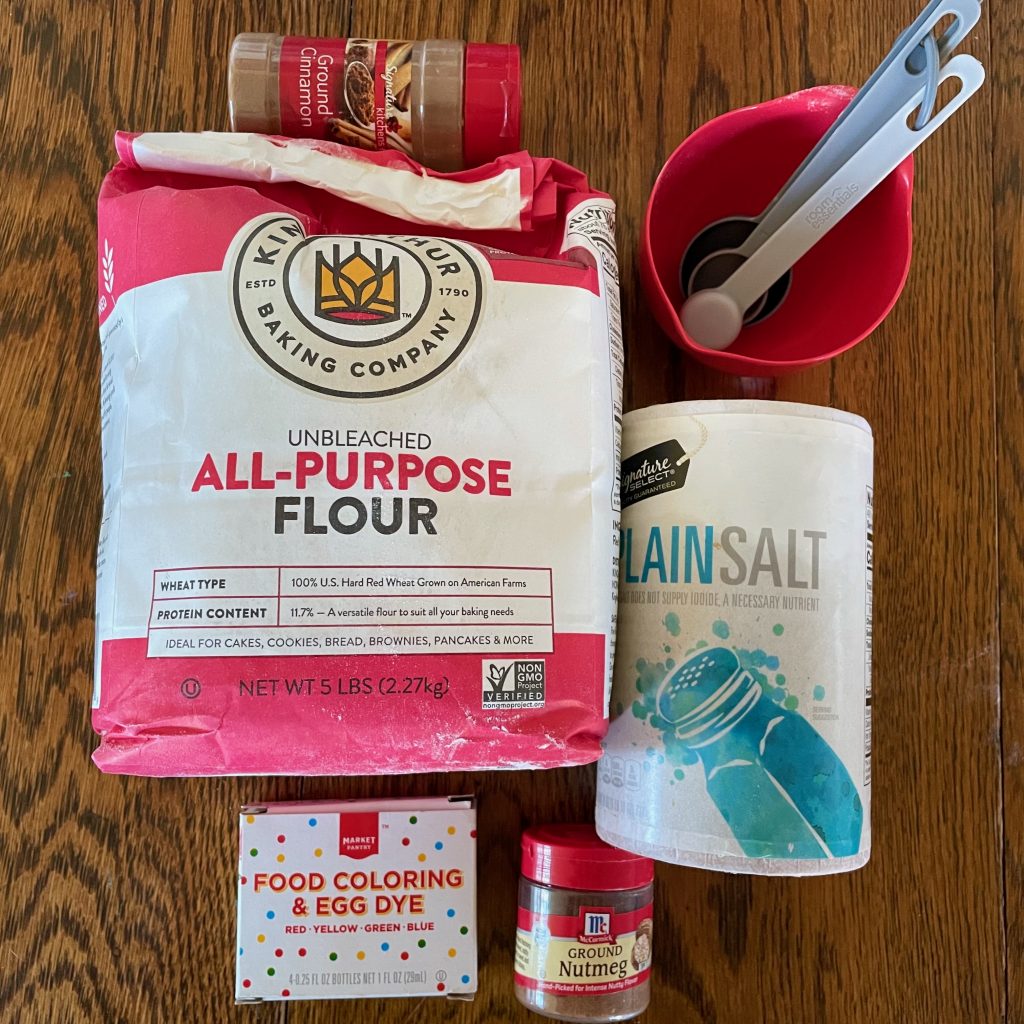
- 1½ – 2 cups flour
- 1 cup salt
- ¾ cup warm water
- 1 tsp cooking oil
- 1 tsp nutmeg (for brown color and scent)
- 1½ tsp cinnamon (for scent)
- Mixing bowl and mixing spoon
- Food coloring or liquid watercolor paints
- Baking sheet lined w/ parchment paper
- (Optional) Rolling pin
- Cookie/biscuit cutters, plastic knives, or homemade stencils for making shapes
- (Optional) Pencil, tempera paint, paintbrushes, and string (all for decorating)
Making the Salt Dough
- Measure the flour and the salt, then pour them into the mixing bowl. Measure the spices, add them to the bowl, and mix everything together.
- Measure out the warm water and add in 1 tsp of cooking oil. Gradually pour them into the bowl and mix them with the dry ingredients.
- Combine the ingredients until the dough holds together and is somewhat sticky. If it’s so sticky that it sticks on your fingers, mix in a little more flour.
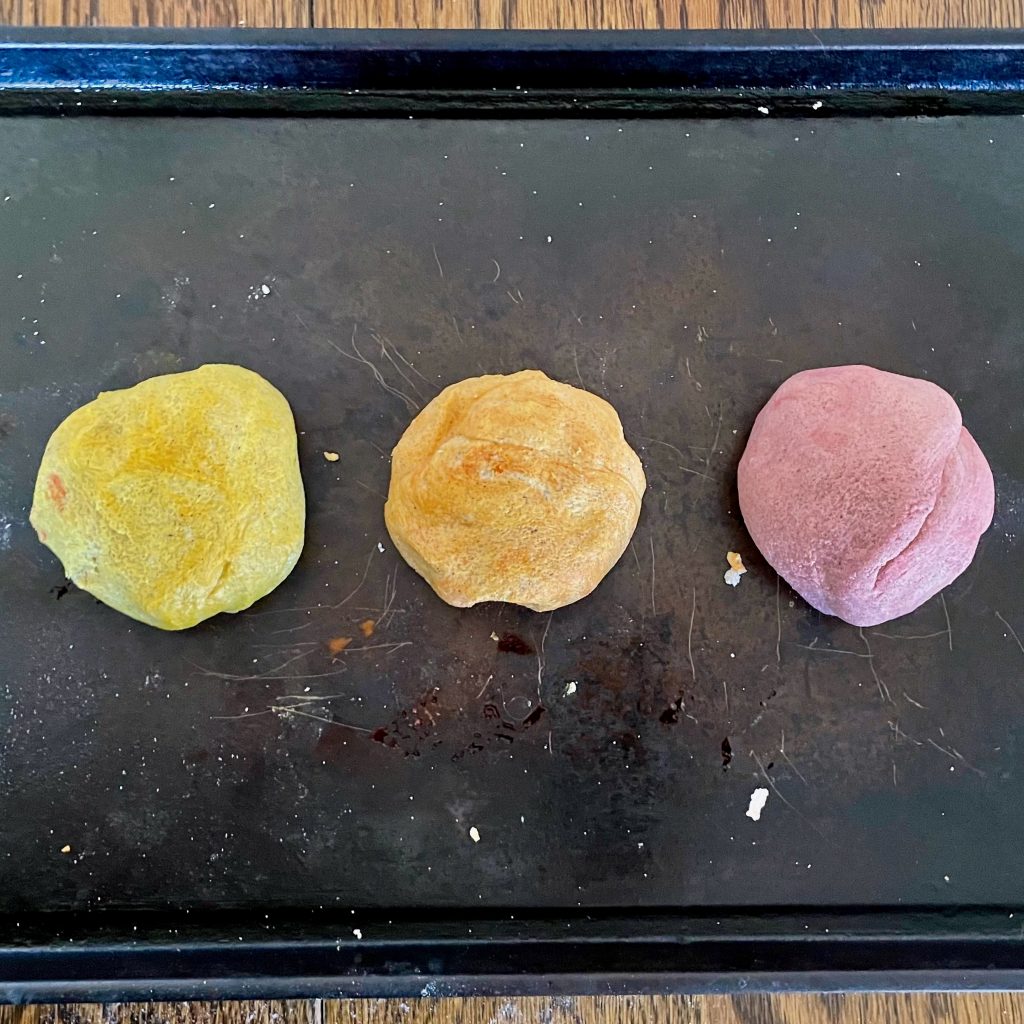
- Divide the dough into 3 equal-size balls. Add a few drops of food coloring or liquid watercolor paint to each ball (use a different color for each ball so you have 3 colors of dough). Push and squeeze the dough to spread the color evenly.
- Flatten the dough using your hands or a rolling pin until it’s about ¼” thick.
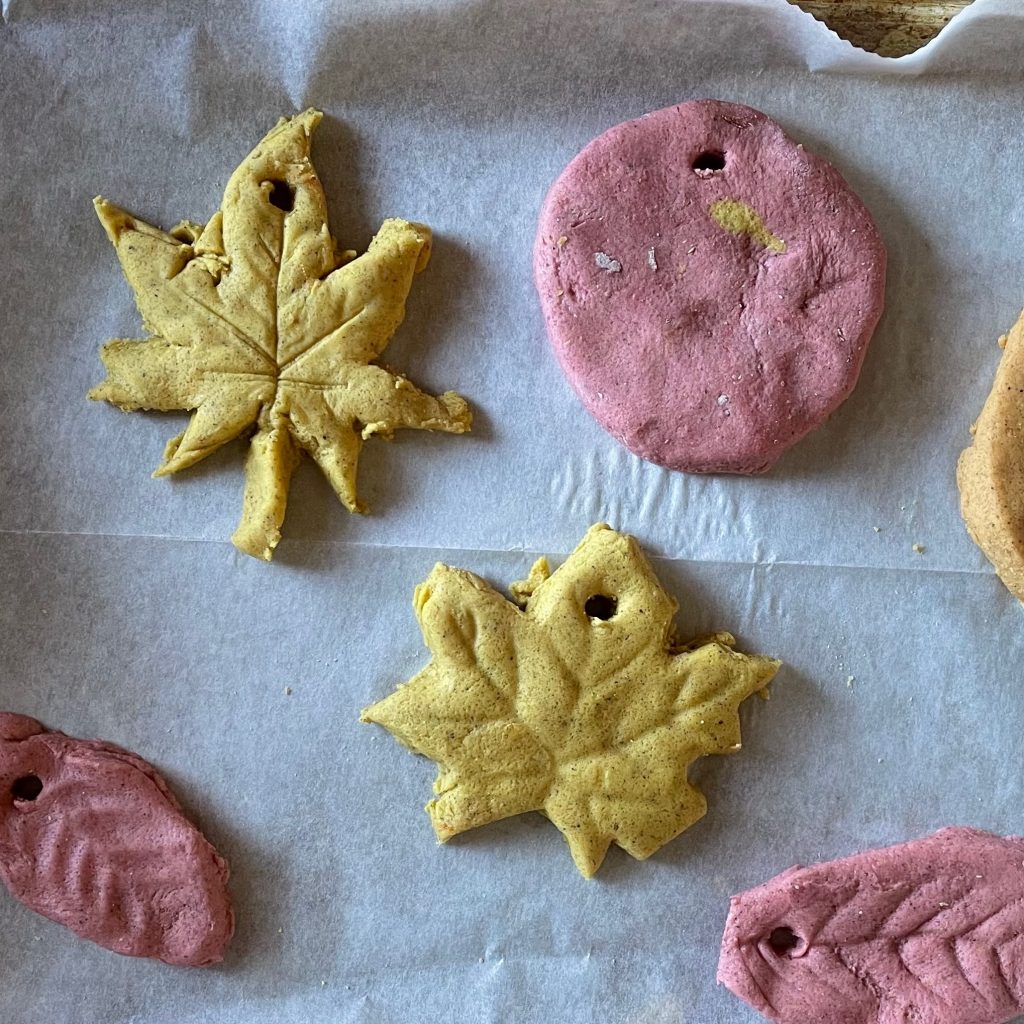
- Use cookie cutters, plastic knives, or homemade stencils to create shapes in the dough.
Baking & Decorating the Salt Dough
- Preheat your oven to 250 degrees.
- Line a baking sheet with parchment paper (or lightly grease the baking sheet with oil).
- (Optional) Use a pencil to poke a small hole near the edges of the unbaked shapes if you’d like to make them into ornaments.
- Place the dough shapes on the baking sheet. Bake them for 1½–2 hours. Check every 15–20 minutes and rotate the pan so all the shapes bake evenly. When the shapes are hard, remove them from the oven.
- (Optional) Once they’re cool, paint and decorate the shapes. If you made holes, tie string through them so the shapes can be hung up.
Storage: Salt dough decorations should be stored in a cool, dry place to be reused in the future. They can also be composted (if no paint or other decorations were used).