
(Disclaimer: This page contains Amazon affiliate links. If you make a purchase from a link, Habitot will earn a small commission at no extra cost to you.)
Habitot has a long tradition of celebrating Lunar New Year, a holiday that commemorates the beginning of the (lunisolar) calendar year with the first new moon. This activity is inspired by a common decoration among many Lunar New Year celebrations – lanterns – which are symbols of joy and good fortune. Using common household items, you and your child will create a colorful paper bag lantern to decorate for the New Year.
This year, Lunar New Year (the Year of the Rabbit in Chinese culture) begins on January 22 and is celebrated through February 5. Happy New Year!
What We’re Learning & Skills We’re Building
- Creativity – making individual choices about how to decorate a paper lantern
- Cultural appreciation – learning about Lunar New Year and Chinese zodiacs
- Fine motor skills – using the small muscles in the hands to grip a paintbrush and scissors
- Measurement – using a ruler to find the appropriate length or width for materials
Materials
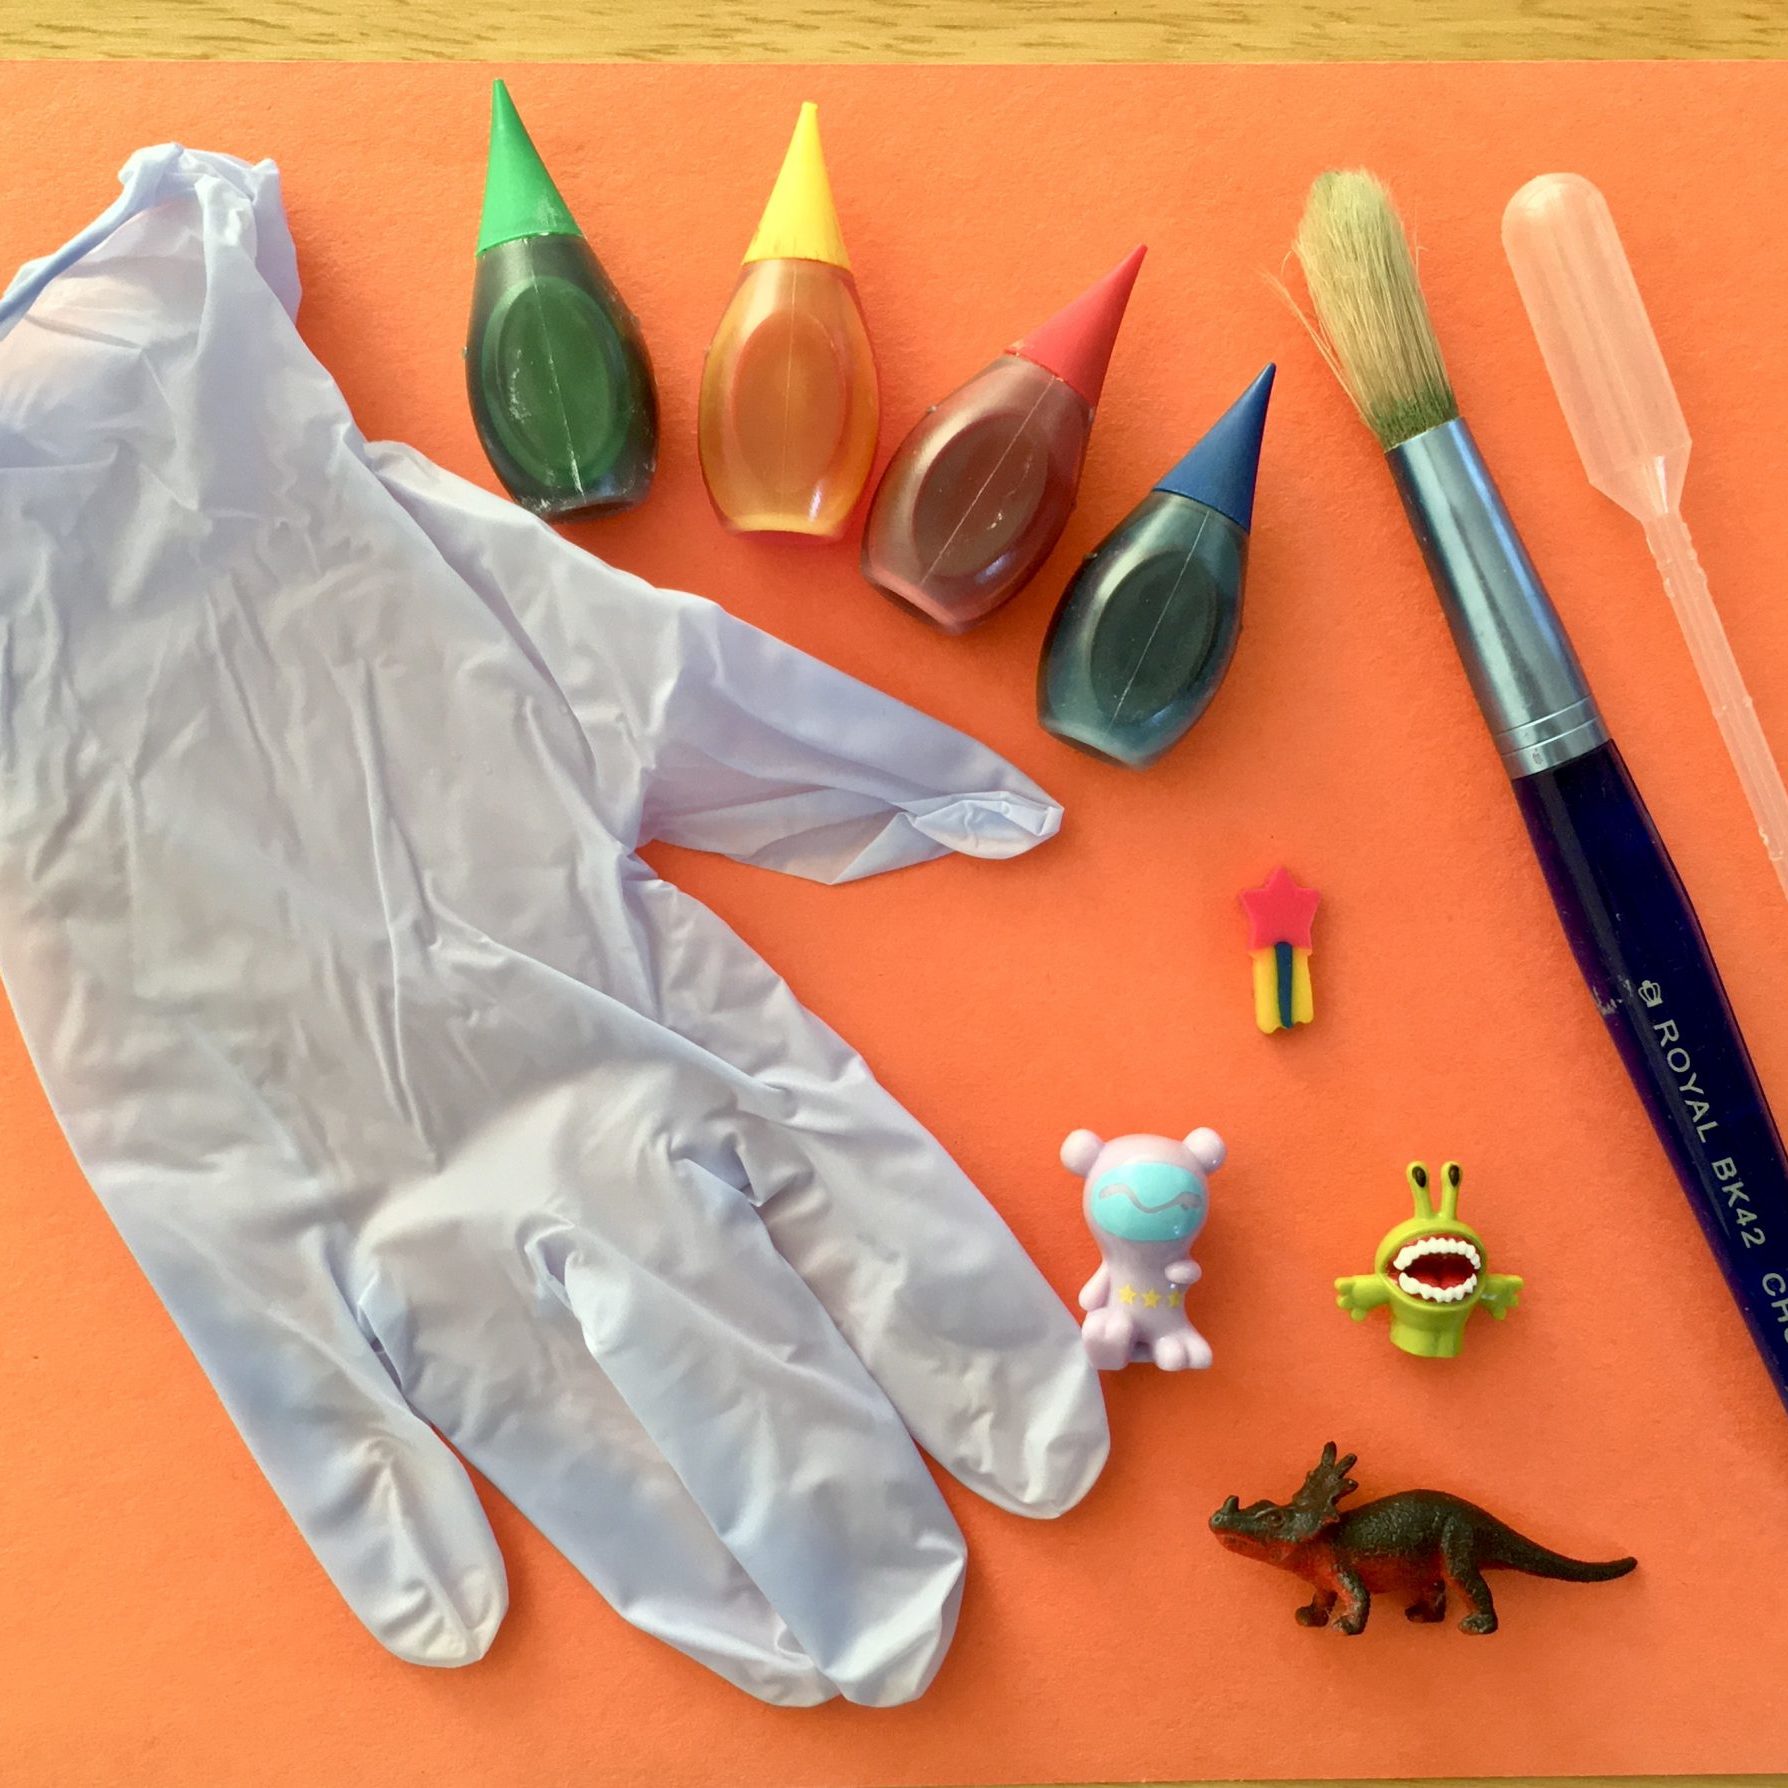
- 1-2 surgical gloves (alternative: balloons)
- Cold water
- Art tray, rimmed baking sheet, or cake pan
- Pipette(s) or medicine dropper(s)
- Liquid watercolor paints or food coloring diluted with water in small bowls/cups
Optional Materials
- Small plastic figurines, small toy animals, pom poms, etc.
- Spoons
- Paintbrush(es) (or old toothbrushes)
- Additional bowls/cups filled with water of different temperatures
- Salt
- Toy hammer
- Cooking thermometer

Setting Up
- (Optional) Insert small plastic figurines, toy animals, pom poms, or other small objects into the glove.
- Fill the glove with cold water until it’s about ¾ full. Leave about 2” of the glove’s opening unfilled. (Optional: Add liquid watercolor paints or food coloring.)
- Tie the glove shut as you would tie up a balloon.
- Place the glove onto an art tray, a rimmed baking sheet, or a cake pan. Put it in the freezer and leave it there until the water is completely frozen (at least 4 hours or overnight).
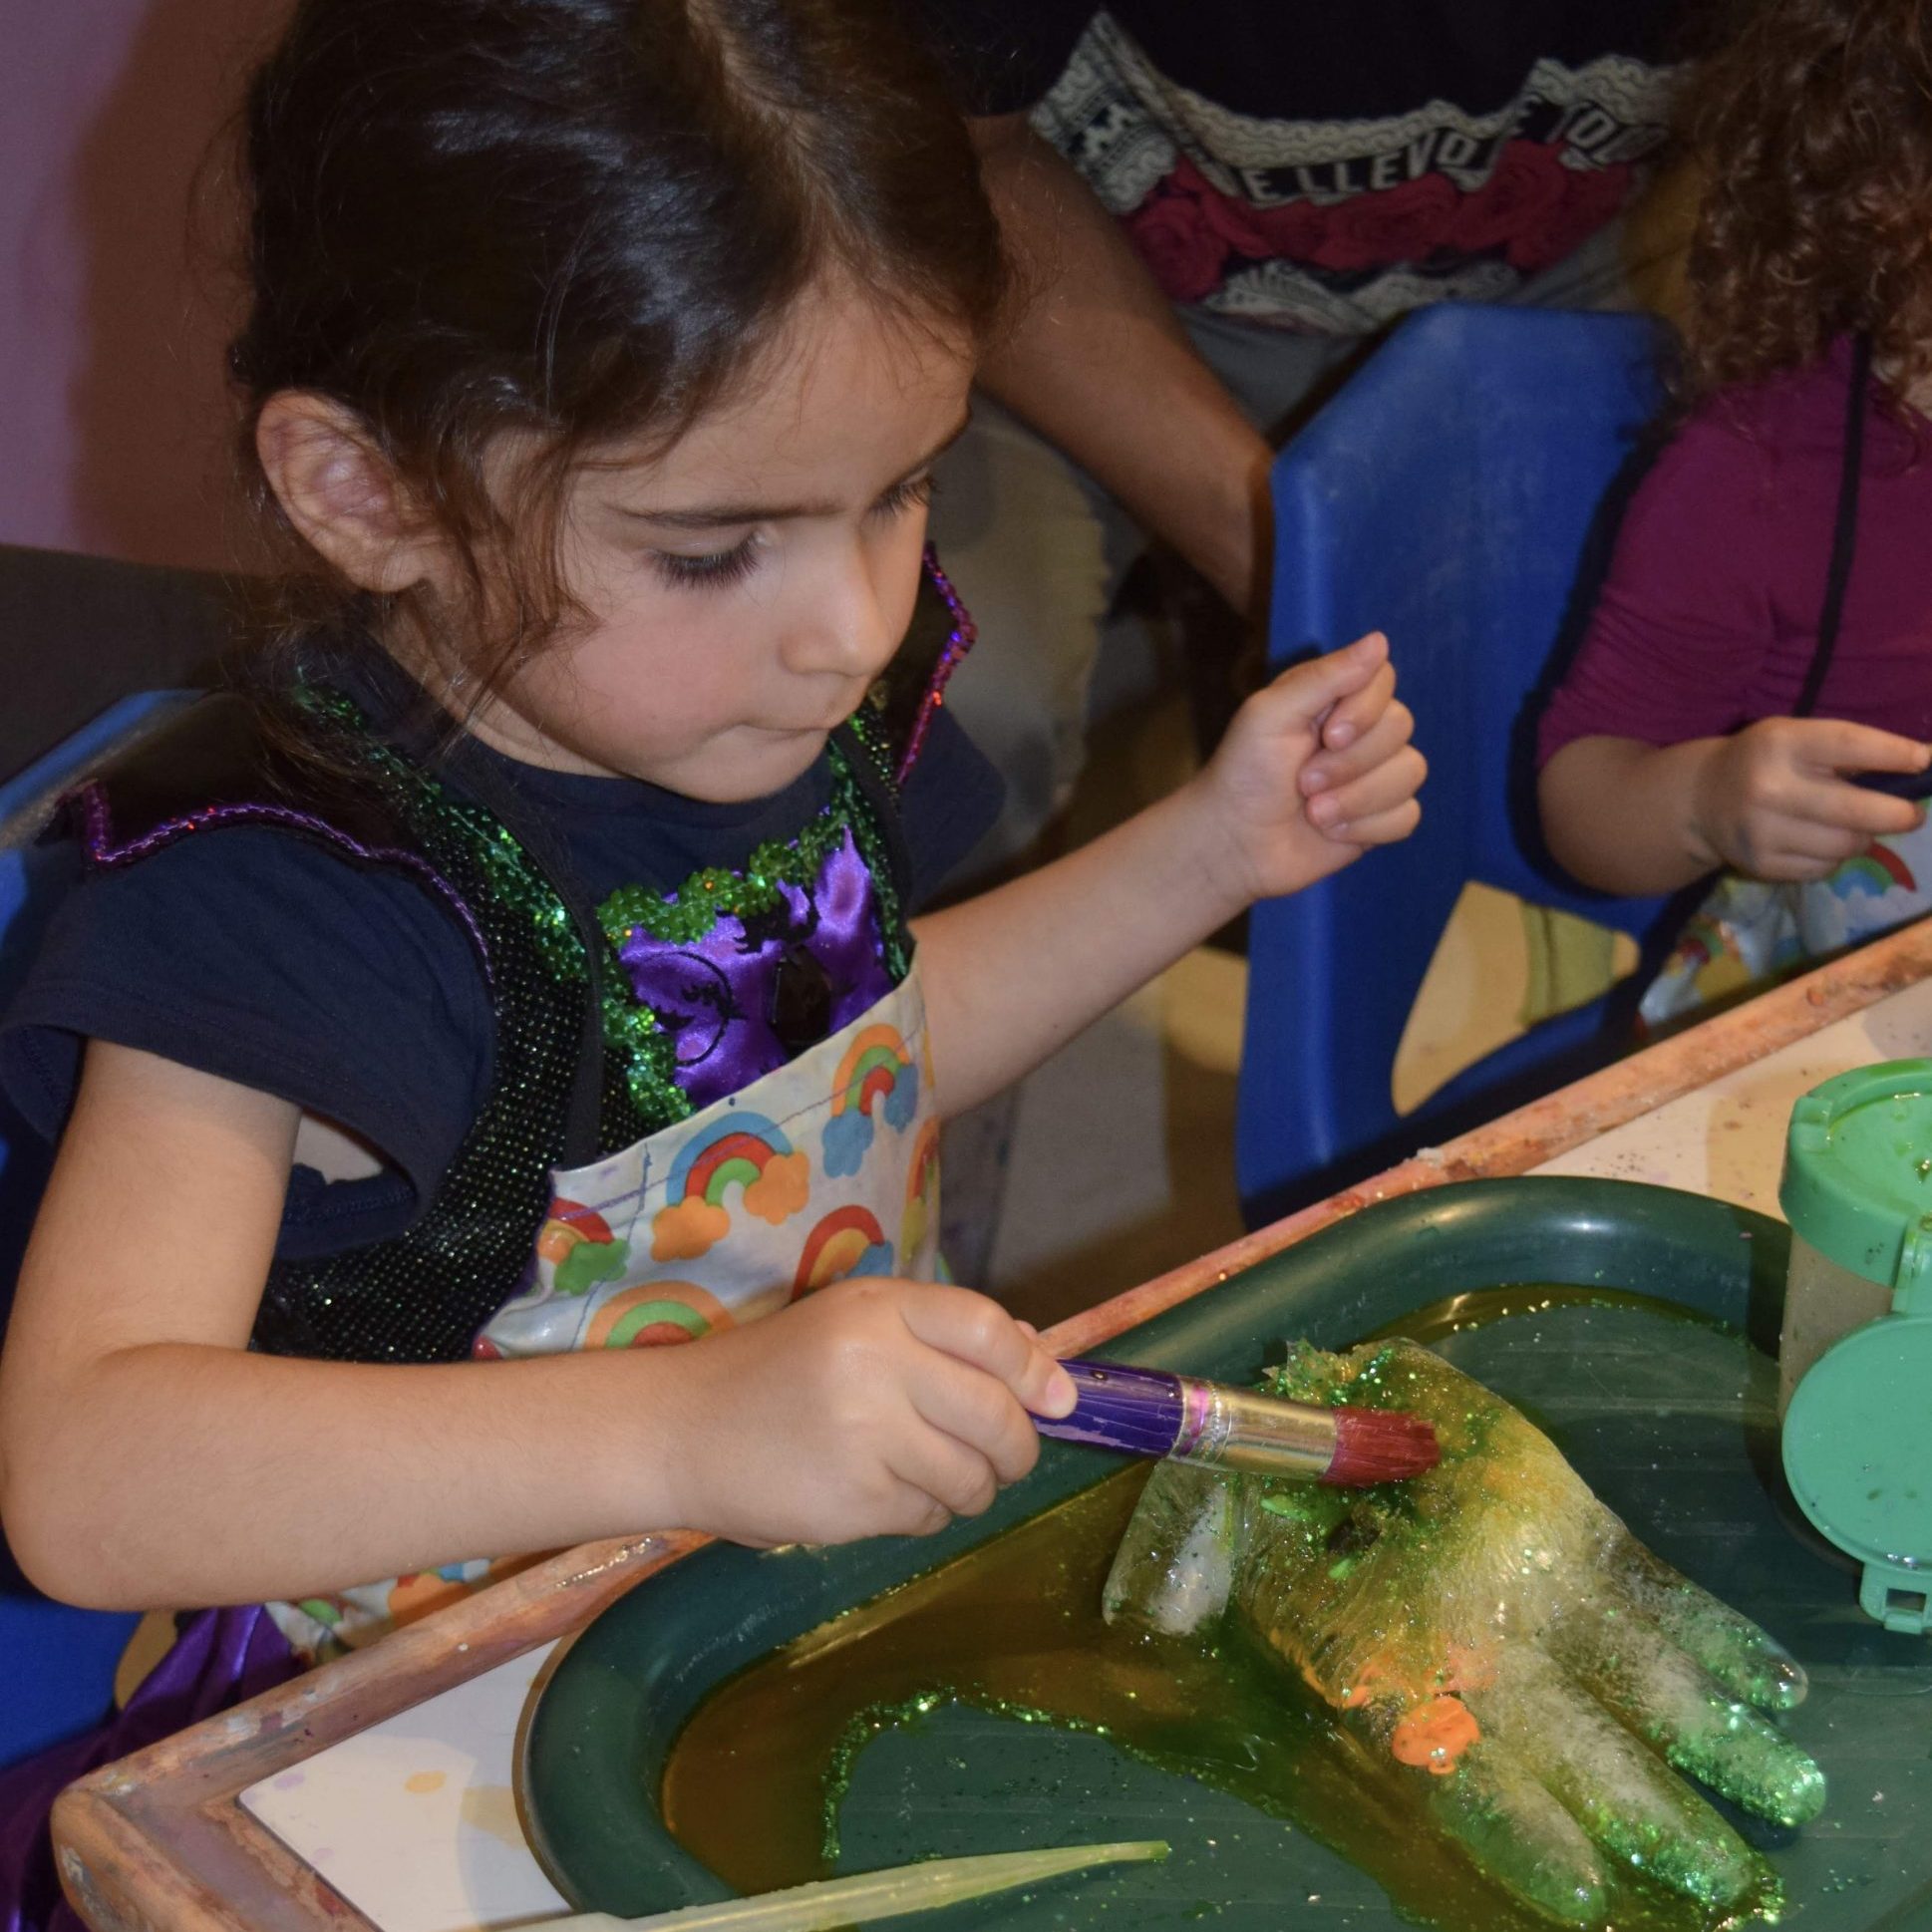
- Take the frozen “monster hand” out of the freezer and cut/peel the glove from the ice.
- In small bowls/cups, mix together water and 5-10 drops of liquid watercolor paints or food coloring.
Exploring, Playing, and Learning
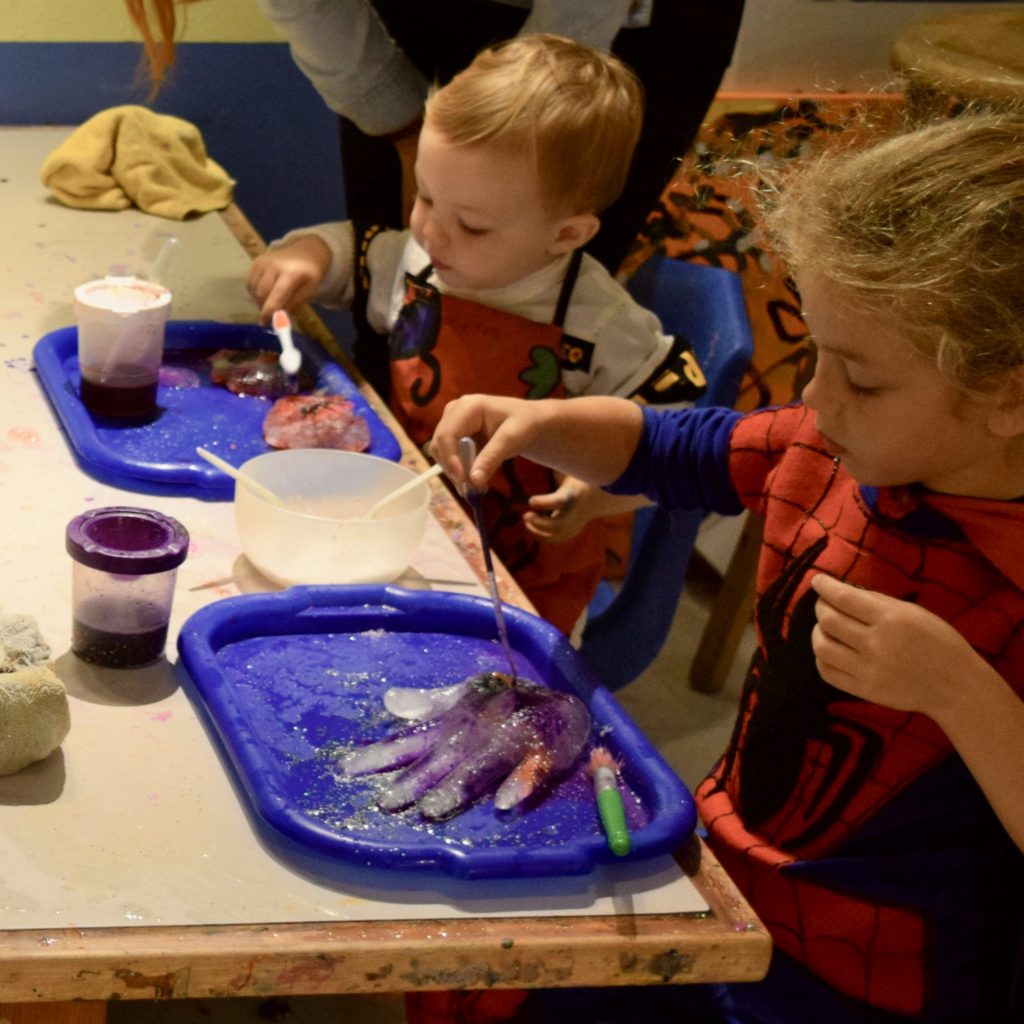
- Encourage your child to observe and touch the icy monster hand. Ask, “What does the ice feel like? Is it cold? Hard? How does it feel now compared to how it felt before it was frozen?”
- Use the pipette(s) or the medicine dropper(s) to squeeze up the colorful water, then squirt it over the ice (spoons and paintbrushes can be used to add the water, too). After a few minutes, ask, “What’s happening to the ice as the water is squirted and poured over it?” Does it look different now than it did when it first came out of the freezer?”
- Introduce water of different temperatures and ask, “Which melts the ice the fastest?”
- As the ice continues to melt, experiment with sprinkling and rubbing salt over it. Use a toy hammer to crack it, paintbrushes or old toothbrushes to wear it down, and spoons to dig in it and extract the figurines or other objects.
- Ask, “What do you see happening to the icy monster hand?” Introduce vocabulary words such as “frozen,” “melting,” “cracking,” or “changing.”
Further Exploration
- Leave one frozen hand outdoors. Note the local temperature and weather conditions. Ask, “What happens to the frozen hand? How long does it take for the ice to turn back into water?” Put a second frozen hand in the refrigerator and note the temperature inside. Ask, “How long does it take for the hand in the refrigerator to melt?”
- Have your child work on one of the hands using only water and the pipette(s) or the medicine dropper(s). Have them work on another hand using only salt, spoons, and other safe tools. Use a timer to see which technique breaks down the ice the fastest.
- Elementary-school-age children can use a cooking thermometer to check the temperature of the ice as it goes through different stages of melting along with the water that pools under the ice.
- Learn more about states of matter from this video!