
What happens when lemon juice is added to watercolor paintings? Using a few common materials, let’s find out! This simple and colorful art project has a touch of STEM learning and makes exploration fun for you and your child.
What We’re Learning & Skills We’re Building
- Early chemistry – adding an acid to paint can change its color
- Fine motor skills – using the small hand muscles to squeeze, grip, and sprinkle
- Experimentation – trying new things and observing the outcome
- Language acquisition – learning words to describe colors and scientific processes
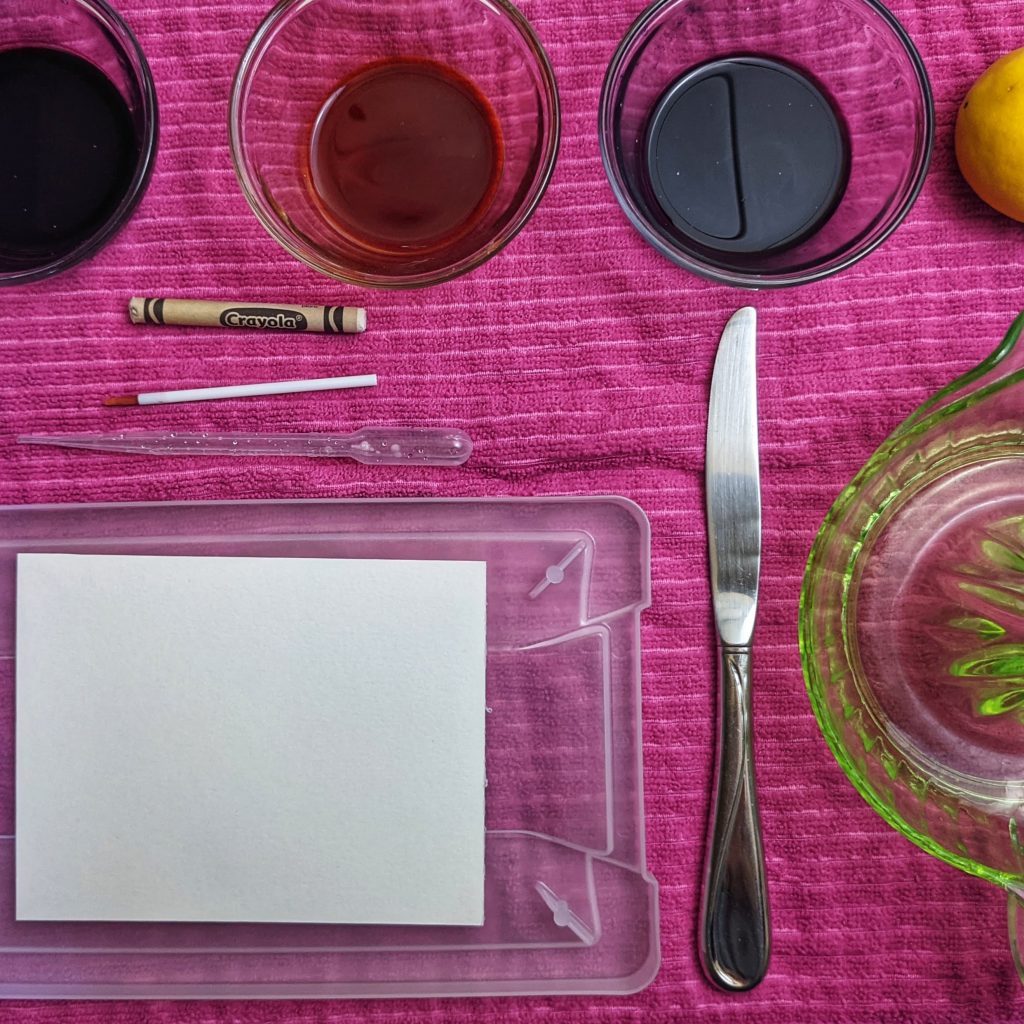
Materials
- Watercolor paper (alternatives: cardstock, thick paper towels, or coffee filters)
- Liquid watercolor paint (alternatives: dry watercolors or food coloring)
- Paintbrushes
- Dropper, pipette, or spoon
- Lemon, child safe knife, bowl, or juicer
Optional Materials
- Any color crayon
- Salt in a small bowl
- Sponge or tissue
- Ballpoint pen or fine-tip marker
- Plastic, ceramic, or metal
Directions
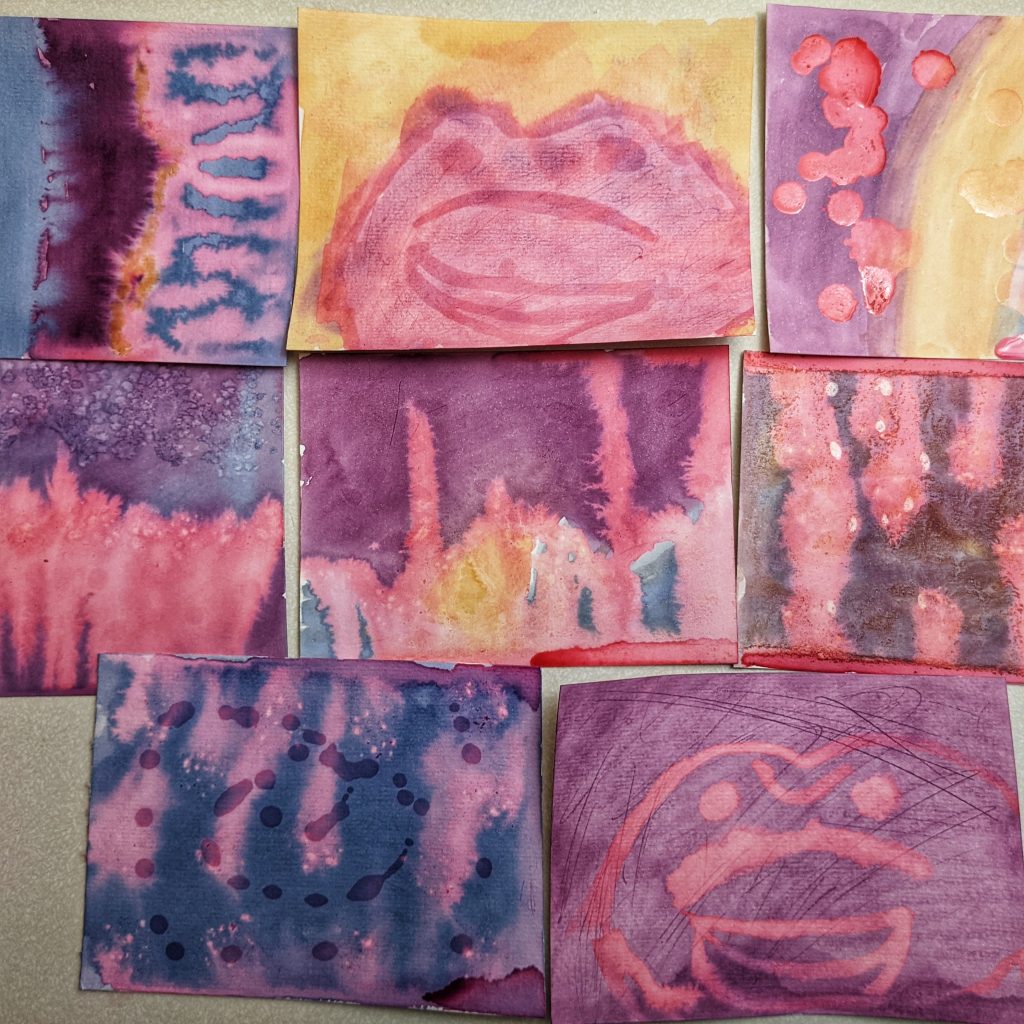
- Cut watercolor paper or cardstock into smaller rectangles (postcard size 4” x 6” works well).
- (Optional) Draw on the paper with a crayon before painting. Waxy crayons act as a resist – drawings will remain on the paper as you paint over it.
- Paint paper cards with liquid watercolors, trying to fill in all the white areas. We painted after dipping our paintbrush into the watercolor paint, and also by dripping the watercolor paint from the paintbrush onto the paper, then spreading it around. There are lots of experiments you can do with this painting process!
- (Optional) While the paint is wet, try sprinkling salt onto it. When the paint dries, brush the salt off. Ask your child, “Do you see anything different about the color of the paint where the salt was? Is it lighter?” (Salt soaks up a lot of the paint, so yes – the color becomes lighter!)
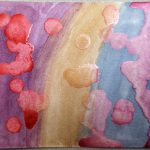
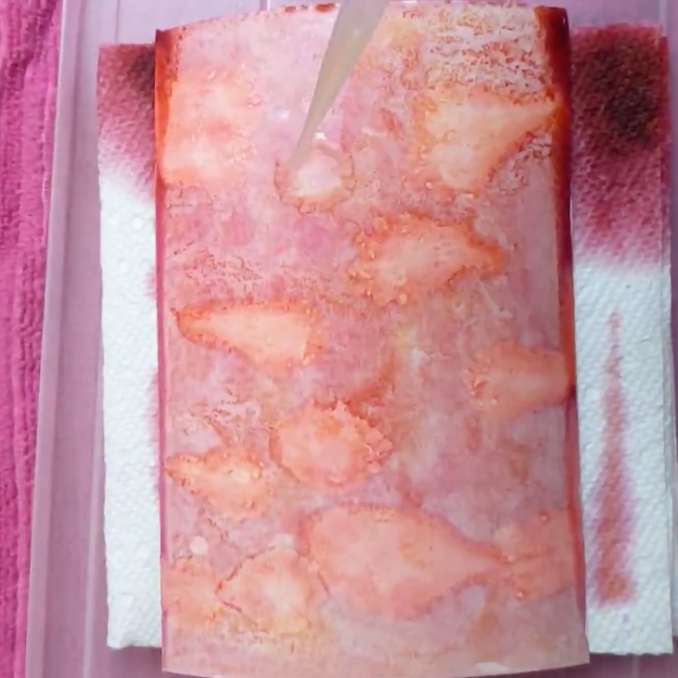
- Using a pipette or paintbrush, drip small dots of lemon juice onto the cards. This can be done when the paint is wet or dry. Let the lemon juice sit on a dry painting for a couple of minutes to soak in before dabbing with a small piece of sponge or tissue. Or, drip the lemon juice onto wet paint and let it pool, then dry. The citric acid will “bleach” out the paint color below it, causing new colors, patterns, and shapes to form.
Exploration
- Changing colors: Lemon juice can make some paint colors fade or become lighter. It can also cause blue dyes to turn red and affect other colors as well. Younger children can learn the words “lighter” and “darker” when referring to the colors. Ask, “Did anything about the paint colors change when the lemon juice was added?” Older children can learn that some colors will change when exposed to liquid containing acid.
- Tracing: Older children can use a black ballpoint pen or fine-tip marker to trace the shapes that were created and turn them into pictures.
- Patterns: Explore the patterns watercolor paint makes as the paper absorbs it. Now, paint some watercolor onto a plastic, ceramic, or metal plate. Ask, “Why doesn’t the watercolor paint make patterns on these surfaces?” Younger children can just observe these differences, while older children might think about the paper absorbing the color.
- Acidity: Think about beverages such as lemonade or orange juice. These have a delicious, tangy taste due to their acidic nature. Pure lemon juice is very acidic – it’s so sour! Ask, “What other foods have this tangy or sour taste?”